FOG Update – Part 5
With FOG registration tested and verified to be working, its time to move onto actually testing image uploading and downloading. If that doesn’t work, its game over. For Part 5, I will deal with how to upload an image to FOG and the process that I take to do this from scratch.
Creating and uploading an image using FOG
There are several useful links that are on the FOG wiki already, which outline the main steps:
- Creating an image for Windows 7
- Sysprepping Windows 7
- Uploading an image
- Finally, the FOG userguide (basically everything about FOG, and a good starting place in general)
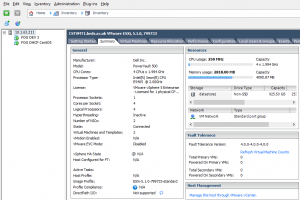
To facilitate all of this, a dedicated Dell 2950 server is running ESX 5.1 so that we can create a virtual machine to emulate our default build.
Why the DHCP server?
The DHCP server runs purely to give out an address to the single virtual machine we have running. This is because within our server room, all servers are configured to have static addresses and therefore, DHCP isn’t needed.
Except that in order to boot from FOG, you need DHCP to be running (and access to a proxyDHCP service). So this server will simply deal out a single address to one client of a specific MAC address – that stops anyone else being able to get given the address accidentally and it means that now we can boot from FOG on our virtual machine.
Why use a virtual machine?
During the sysprep process, all hardware information can be stripped out using the /generalize switch, so the platform and hardware is largely irrelevant. However, the advantage to using a virtual machine is that, not only can it be accessed remotely, but it also can have its state saved in snapshots.
This makes it easy to roll back in time to an earlier version where, say, an older version of software is used and, crucially, after sysprep has been performed, the image can continue being edited later as if the sysprep process has never been even touched.
The Process
For anyone thinking of doing the same, I would suggest reading the above FOG guides as they get to the point and give you pretty much all the steps you need. But here’s how I did – and still – do it myself.
I started with a clean Windows 7 build, although at the stage where you actually enter any details, you can enter audit mode by pressing Ctrl+Shift+F3. While in audit mode, you are modifying the default profile (although the user folder is called Administrator), so everything you do gets replicated to all users.
Note that this can be an issue in some cases. For example, I found out that Opnet writes files to /Appdata/Local and explicitly saves the user as Administrator. This has to be manually changed, otherwise all subsequent profiles will try and access the Administrator user area. Similarly, if Eclipse is launched, it will save the user in preferences as Administrator, meaning that any subsequent users are unable to launch Eclipse at all. I will make a separate post about this in future…
I install most of the software we used manually because, with a 1gbps network connection, a ~70GB system installation can take somewhere from 5 – 15 minutes to download onto a host machine, depending on how the intermediary switches are behaving. The alternative way to image systems is to install nothing after this base installation and, instead, use FOG’s Snapin functionality to remotely push packages out. However, it was felt that given the speed of multicasting, it can be far more efficient to restore a saved image of a system onto all PCs at once, rather than have each one manually pull down packages that may, or may not, individually fail.
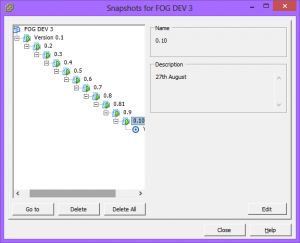
At various points, windows updates are done, software is updated and changed and restarts are made. I found an issue once with a Windows Media Player Network service, which caused the sysprep process to fail, so although doing updates to Windows on the base image is fine, I make snapshots along the way. These are crucial, actually, and are the main motivation for using a virtual machine for this process. It means we can delay Windows activation until the end and we can undo huge volumes of changes within seconds, being able to roll back to a different point in time as necessary.
Of course, alongside this, I keep a changelog and note down what I installed, uninstalled and changed at each point in time. This is really important because uninstalling one package can have affects on others, especially if they use Visual C++ redistributable packages (one application may rely on a specific, yet old, version of the redistributable, as Broadcom seem to have made happen with some of their wireless/bluetooth software).
When ready to deploy, I then take a snapshot of the system as it currently is (ideally saving the contents of what is in memory) and install the Fog service. This is a cool client-side application that allows for host naming, Active Directory registration, printing, and snapins (among other thing) to happen, with the snapins being one of the best parts of FOG. Some packages, such as Unity, can be used for free only by individuals. Unity is used at our University, but only on ~50 of the PCs we own. Therefore, we could install it everywhere, but not legally. Snapins mean we can deploy Unity remotely to only specific PCs, or run commands on those PCs.
Finally, I use Sysprep. I used to use Fogprep, which made certain registry changes as far as I can tell to prepare the system to be imaged, but FOG now seems to do this for you during the image restore process as far as I can tell. Sysprep is a Microsoft tool for preparing the system for first use; the OOBE option presents the user with a first-use screen (like when you buy a new PC) and the “generalize” option removes all hardware information from the system, so that new hardware can be detected. For this to work with all hardware types, I specified in the registry (HKEY_LOCAL_MACHINE/Software/Microsoft/Windows/Current Version) the additional folders to search for drivers that I know the system needs (usually the extracted NVIDIA drivers and each motherboard driver type). Now, when Windows is first booted after this process has been run, it will scan for drivers for attached hardware.
Sysprep also can use an “answer” file to automate most of the process. So, for the OOBE, you can skip all of the language, region and even license key steps if you have all of this included in a sort of configuration file, usually named as “unattend.xml”. Back in Windows XP, this was mostly the same, but now the tool to create this file is included in the Windows Automated Installation Kit (WAIK). However, you can manually pick this file apart and make your own if you understand a bit about XML, so you can specify a command to activate Windows through KMS, specify locale options, choose to skip the rearm process (to stop Windows reactivating; it can only be reactivated 3 times ever!) and a range of other things.
The following command does the above and will shut Windows down afterwards.
C:WindowsSystem32sysprepsysprep.exe -OOBE -generalize -unattend:unattend.xml
Note that, from this point, starting the “sealed” machine will initiate everything and set up Windows as it would be, had you gone through the whole customisation process. For this reason, I make a snapshot right before initiating Sysprep – although if you are thick provisioning for your virtual machine, snapshots can get HUGE.
Now, to actually make the host upload its current image, the host has to be associated with an image. Whatever is selected as the associated image will replace anything that exists for that image already – so make sure you really want to overwrite what is already there! From the FOG management webpage, navigate to the host where you are uploading from under “Host management”, go to basic tasks and select “Upload”. 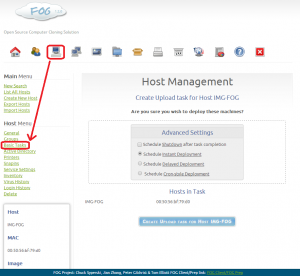
When you start this, the host – during PXE boot – will see that there is a job for it to do and it will then start uploading the contents of the drive to the FOG server. This is usually a very smooth process – so long as the virtual machine is set up to network boot (otherwise, you will just boot into Windows..).
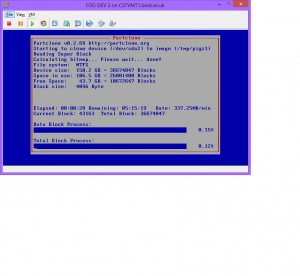
I restarted the VM and got the following screen:
So far so good. I preferred the old look, to be honest, and the refresh rate of the information is every second, so it “feels” sluggish – but actually it shouldn’t be any different. However, initially I noticed that the speed was oddly very slow. In fact, it only climbed to about ~400MB/min – seems still really slow when you consider it should have a 1gbps link; its acting as though its only a 100mbps link! For comparison, it used to just touch 1000MB/min (and lab PCs could top 5000MB/min, which seems still slow, as I would reckon that makes each connection only use 600mbps – but accounting for switching, perhaps it is not too bad).
However, by default, the PIGZ compression rate is set to “9”, under the FOG settings. Changing it to 0 results in an upload speed that approached what I was used to seeing:
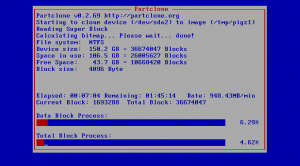
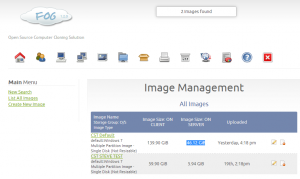
However, this comes at a cost:
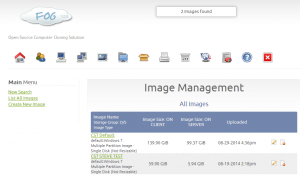
So the space taken up on the server by the image is around 90GB – compression that would halve the upload speed and halve the upload size. Its a tradeoff for a quick image creation – and with over 1TB storage, I am happy to use no compression for now. However, in future, it’ll have to be maximum compression when using many images. Note: I tested out downloading a compressed versus uncompressed image with no speed difference at all – so there is no gain or change in speeds when downloading to clients. I’d be interested to find out more why the speeds vary so much and never hit their potential maximum!
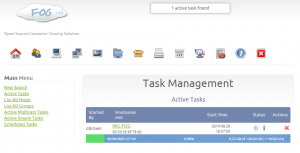
Anyhow, this will take a few hours to upload but once this is done, the real test will be downloading to a host and multicasting! And while we are waiting, one of the new cool things in the FOG browser is being able to see the client speed and progress (which didn’t seem to work in 0.32 for me..)
‹ FOG Update – Part 4 FOG Update – Part 6 ›
